How to work with Webflow editor
How to manage your website in the Webflow content management system
1. Registration to administration
Once we have marked you as an administrator, you will receive an invitation to the Webflow Editor in your email. We recommend using it in Chrome. In other browsers, we often encounter problems caused by cookies settings.
Clicking on the link in the email will take you to your website, where a bar with the registration form will appear. Fill in the details and create a password.
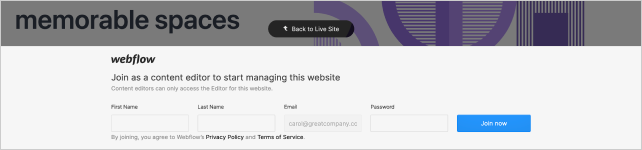
When you click on a button Back to live site or anywhere above the bar, the form will hide. If you need to open it again, click on the arrow at the bottom right.

BEWARE: If Webflow Editor does not work correctly in Chrome, make sure that you have third party cookies enabled in your settings.nastavení povolené cookies třetích stran (third party cookies).
2. Access to administration
If you come to the website and do not see the edit bar, just add "/?edit" after the URL in the address field of the browser.

Next time, the browser should remember you and at the bottom right you will only see a button Edit site with which you can open the administration.
BEWARE: Some elements may appear differently in the Editor than visitors to your site see them. If you want to look at the real page, double check the published changes after publishing in incognito mode or another browser.anonymním režimu.
3. Toolbar
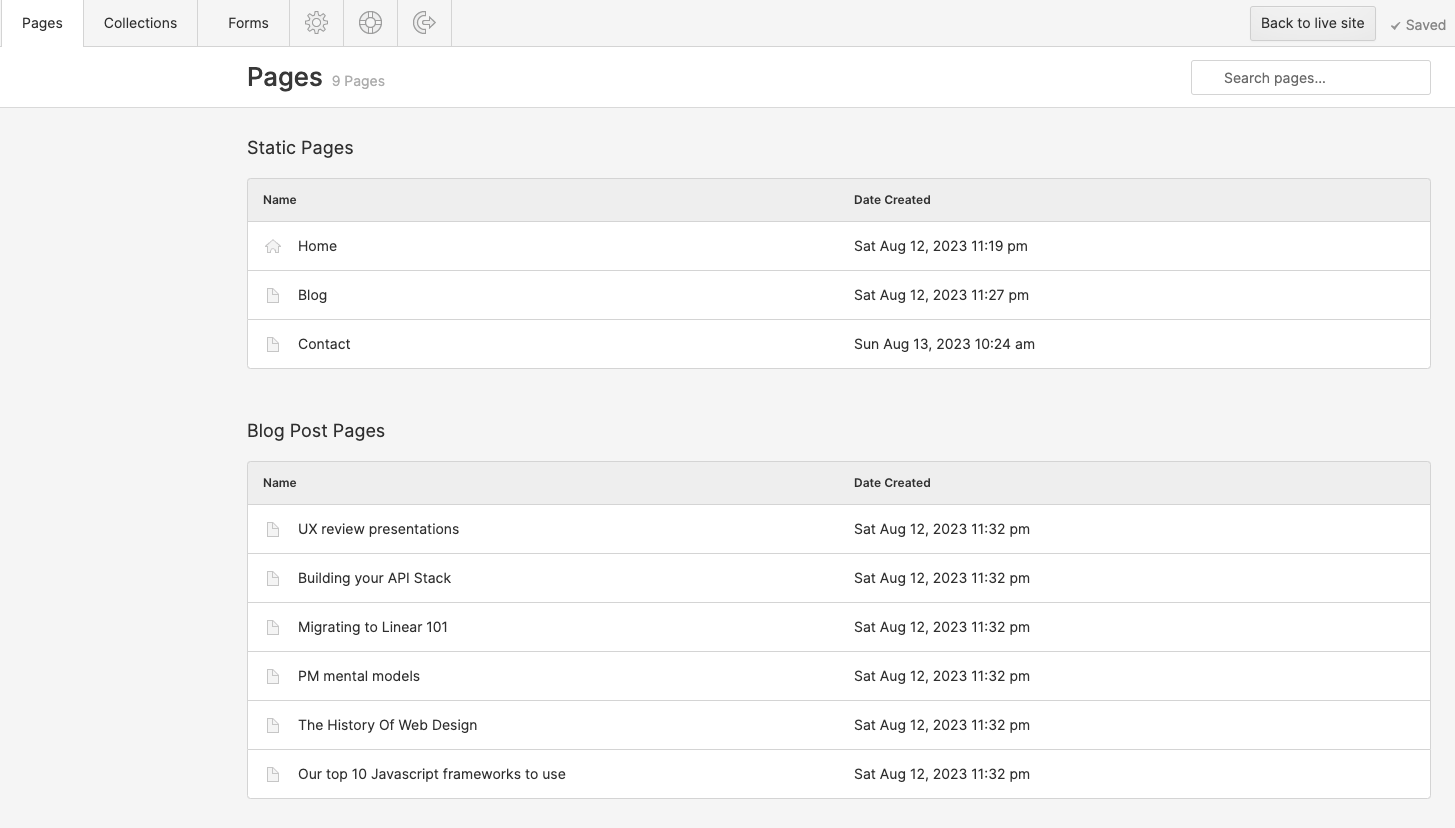
After logging in to the Editor, you will find the following bookmarks in the bar:
In the tab Pages you can find a list of all subpages.
You only see Collections if your site contains dynamic content (such as a blog). Here you can find the entire database of posts or other similar pieces of content.
You only see Forms if you use forms on the site. In this tab, you can view the data that visitors have filled out in the forms or export them in CSV.
Click Settings ⚙️ to manage your Editor account.
Under the Lifesaving Circle 🛟, you can find answers to frequently asked questions.
The icon with arrow will log you out from the administration.
4. Editing on the page
You can edit content directly on individual pages. Hover over a text, image, or button and click the pencil icon ✏️.
4.1. Editing and formatting text
When you hover over text, a pencil icon appears and the text box is highlighted. When you click on it, you can edit the content and style of the text.
Some texts are set as so-called rich text. These allow more formatting options and you can learn more about them in Chapter 6.2.
4.2. Changing images
Hover over the image you want to change and click the image icon.
TIP: To make your website load quickly, compress your images before uploading. You can use, for example, tinyjpg.com.
4.3. Editing buttons
Hover over a button and click ⚙️.
You can edit 2 parameters:
Edit link settings allows you to change the address of the link and have it open in a new tab.
With Edit text, you can edit the text of the button.
5. Pages
Pages include the following functions:

5.1. Search field
Search between pages by their name.
5.2. List of pages
You can move around your site by clicking buttons in the navigation, etc., but this list of all subpages tends to be more reliable.
5.3. Page setup
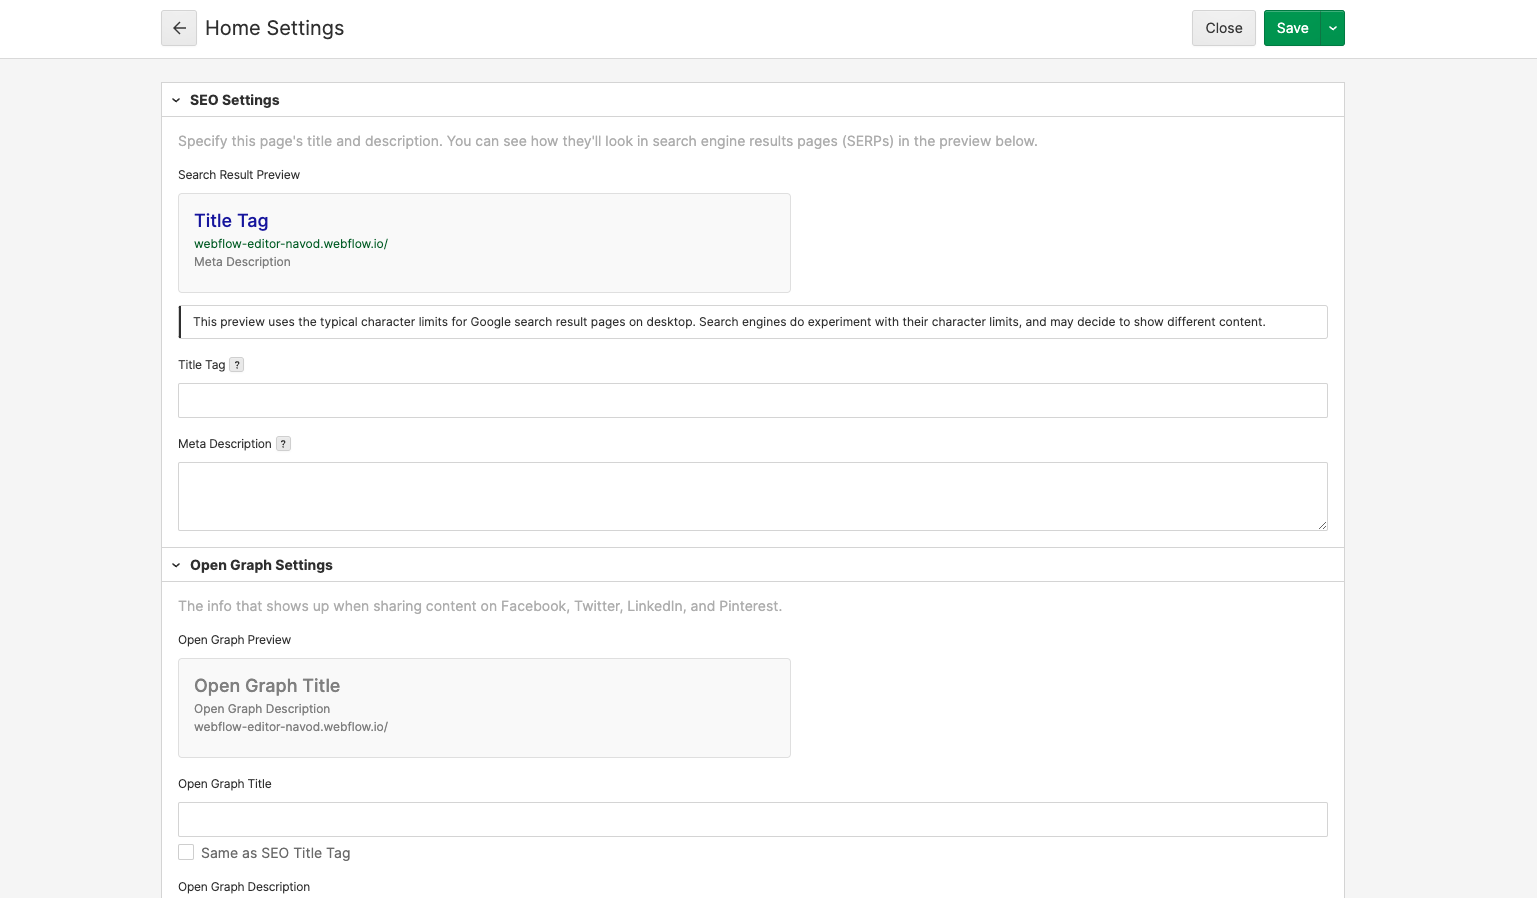
Hover over the page in the list and click ⚙️ Settings.
Here you can manage meta data and other SEO related settings. For example, content marked as Open Graph appears when a page is shared on social media.
Title Tag and Meta Description are texts that people will see in search engines. For example, it may look like this:

When you tick the check-boxes Same as SEO Title Tag and Same as SEO Meta Description, the meta data will be automatically copied to the Open Graph fields.
Open Graph Image URL: Copy the link of the preview image here. We recommend uploading it directly to Webflow and copy the link afterwards. OG image should have 1200 px × 630 px and size up to 4 MB.
RSS Feeds: For pages from Collections you can enable RSS feed and adjust its settings.
6. Collections
In Collections you can create and manage dynamic content, such as blog posts.
When you click on one of your Collections, its tab appears in the bar for easier access.
6.1. Navigation
Here's what you can do with your collections:
Search: Search pages by title.
Filters: Filter pages by various parameters.
Selection: You can select multiple pages for batch administration: export, delete or change parameters.
Export: Download all content from the collection in CSV format.
Pin icon 📌: View advanced parameters and filter by them.
6.2. Item detail
Click on a specific page to edit it or create a new one with the green + New button.
URL Slug: When you name a page, its URL will be filled in automatically. If you change the name afterwards, you should manually rewrite the URL. Keep in mind that existing external links will stop working when you change the address.
Pictures: Upload compressed images to keep your loading times fast.
Rich text: If you want to format the text, mark it and select a property from the menu.
Always use consistent headline sizes. Start with H2, continue with H3, etc. Don't use the H1 heading — that's already part of the design.
Headings may seem small in the Editor because the styles are added on the actual page. Therefore, we recommend checking the appearance of your content outside the toolbar (and double-checking after publishing).
The same applies to spaces. Do not click Enter more than once just because the text feels heavy. The spacing has been already taken care of during the development and spaces are automatically added on the page.
7. View changes and publish
Whenever you change something on the page, you will see the status on the bottom right. The Editor saves the changes even if you log out and do not publish the page. Next time you log in, you can pick up where you left off.
In the Changelog section (bottom right, next to the Publish button) you can see the list of changes you made.
Click Back to the live site to preview the edits and browse your site as usual.

Once you are done with the work, click Publish to make it alive.
TIP: Until you publish the page, you will only see all changes inside the Editor.
Do you need help with Webflow?