1. Benefits of the new editor
The new Webflow editor offers more convenient and streamlined content management for your website. Compared to the previous version, it offers:
- In-page editing — you see exactly what visitors will see
- Editing within complex elements — navigation, tabs, sliders, and other components
- Real-time comments and collaboration — you can discuss changes directly on specific elements
- Image and media management — access to all uploaded files, the ability to compress directly within Webflow, and easy addition of alt text
- Multi-device preview — switch between desktop, tablet, and mobile directly in the editor
TIP: You can find more detailed guides and videos on — Webflow's official educational platform with courses and tutorials in English. For a quick overview, we especially recommend the section dedicated to .
2. How to access the editor
You'll receive an email invitation. Accept the invitation and log in at webflow.com. Your dashboard with your website will open — click on it to enter the editor.

TIP: For repeated logins to the editor, use the Webflow dashboard or add ?update after your website address in the browser (www.yourwebsite.com/?update).
3. Editor orientation
After logging in, the editor opens, displaying a preview of the website as visitors see it. The interface has three main parts:
3.1 Top bar
It contains the CMS tab, page switching, an overview of currently active users, a tool for comments and sharing, and the Publish button to make changes live.
It is also possible to switch between different breakpoints (desktop / tablet / mobile) to check how the website appears on various screen sizes.
3.2 Left panel
Here you will find an overview of all pages in the Pages tab (keyboard shortcut P) and media management in the Assets tab (keyboard shortcut J).
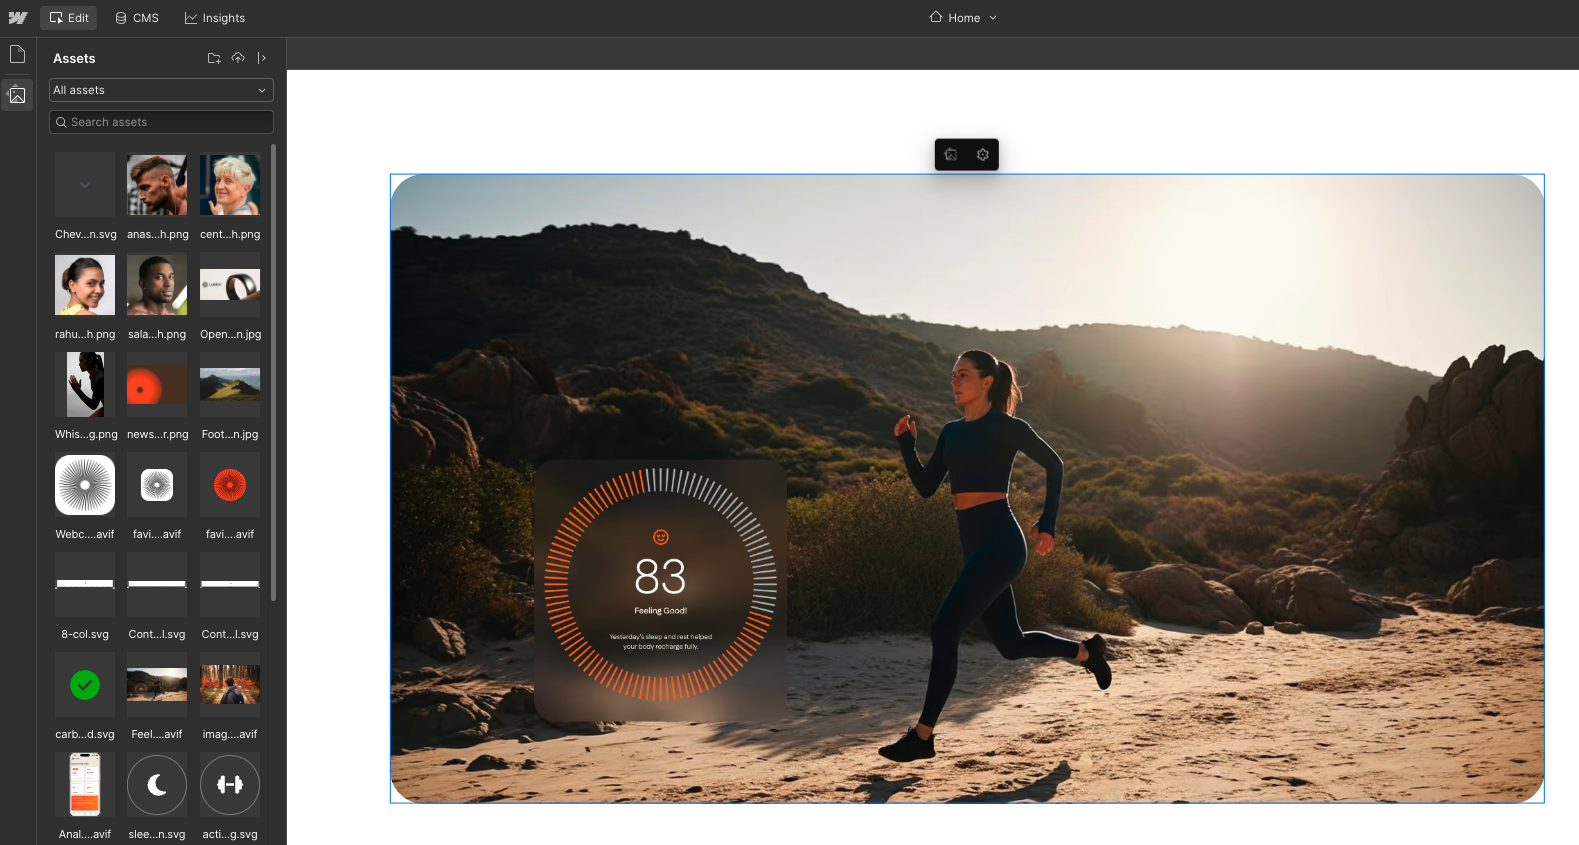
3.3 Editor (canvas)
The main area with a website preview. Editable elements are highlighted with a border when you hover over them — double-click a selected element to start editing its content.
ATTENTION: Due to custom code, some elements in the Editor may appear differently than they will to your website visitors. To see the real result, click the Preview icon in the top bar and check Enable custom code, or check the published changes on the website in incognito mode.
4. What you can edit
As a Content editor, you have access to these actions:
- editing text and formatted content directly on the page
- replacing images and media
- editing alt text
- adding or changing links
- creating, editing, and managing CMS items (e.g., blog posts, team members)
- editing SEO settings for individual pages
- adding comments and collaborating with colleagues
- publishing changes (if you have been granted this permission)
TIP: Depending on your website's settings, you may also have access to other features such as analytics (Analyze), optimization (Optimize), or localization (Localization). If you have access to these sections, we will be happy to explain how to use them.
4.1 What Cannot Be Edited
Page layouts, styles, components, CMS collection structure, or custom code. The structure of collections (which fields exist, how content is displayed) is set by us — if you need a change, please contact us. Thanks to these limitations, your edits will never disrupt the website's design.
5. How to Edit Page Content
Open the page in the editor. Hover your cursor over the element you want to edit. If an outline appears, the element is editable, and you can double-click it to start editing. Changes are saved automatically — you don't need to confirm anything manually.
Unlike the previous editor version, you can now edit content even within more complex elements such as navigations, tabs, or sliders.
5.1 Editing Text and Formatting
Click on the text element and start typing. A formatting bar will appear above the text, where you can change bolding, italics, add links, and more.

Some text blocks are set as rich text, which allows for more advanced formatting. Correct spacing between paragraphs is part of the design; you do not need to add it manually. When working with longer text, adhere to the heading hierarchy (H2, H3, etc.).
CAUTION: Never use an H1 heading in rich text; there is always only one H1 on a page, and it is generated automatically.

5.2 Replacing Images
Click on the image you want to change. A dialog box will appear where you can upload a new file or select an image from the Assets tab.
After uploading an image, remember to fill in the alt text (alternative description) — a short description of what is in the image. Alt text improves website accessibility for visually impaired users and helps search engines better understand the page content.

TIP: To ensure fast website loading, upload compressed images. You can compress images directly in Webflow — in the Assets tab, right-click on an image and select Compress (we recommend choosing the WebP format). Alternatively, you can compress images before uploading them using tinyjpg.com.

5.3 Editing Links
Click on a link or button — the link settings will appear in the right panel. You can change the target URL, set it to open in a new tab, or remove the link.

6. Previewing and Publishing Changes
Saved changes are not automatically displayed on the live website. Publishing controls when changes are actually shown to visitors.
If you have publishing permissions, you will see the Publish button in the top right corner. Before publishing, review the changes and ensure they are complete and that no one else is currently editing the same page.
If you do not have publishing permissions, Webflow will notify you — your changes will remain saved, and we will publish them for you.
When publishing, Webflow will ask you to select a domain. You have two options:
- Staging (address ending in .webflow.io) — a test version of the website that visitors do not see. It is not indexed by search engines, so it cannot be found via Google. It is used to check changes before publishing them to the live website.
- Production (your domain, e.g.: yourwebsite.com) — the live website that visitors see.
TIP: Until you publish the changes, you will only see them in the editor. For verification, we recommend opening the page in an incognito browser window after publishing.
7. Static vs. Dynamic Content
There are two types of content on the website:
- Static content — text, images, and links directly on a specific page. Changes are reflected only on that particular page.
- Dynamic content (CMS) — content managed in the CMS, such as a blog, team members, or case studies. Changes are automatically reflected everywhere on the website where the item is displayed.
TIP: If you change a team member's name in the CMS, it will be updated everywhere that information is linked — e.g., on the About Us page, in the footer, in the team members list, etc.
8. How to add and edit CMS content
In the CMS tab (database icon in the top panel), you will find an overview of all dynamic content collections — such as blog posts, team members, or case studies. Here you can edit existing items and create new ones.
8.1 Adding a new item
Open the CMS tab (database icon in the top panel). Select the relevant collection (e.g., Blog Posts). Click the blue New item button. Fill in the required fields — title, text, image, date, etc.
Each CMS item has one of these statuses:
- Published — the item is published and displayed on the website
- Draft — a work-in-progress concept, not displayed on the website
- Changes in draft — a published item with ongoing edits that are not yet public
- Queued to publish — item awaiting publication (will appear after the next website publication)

Use the preview to check how the item will look on the website. You can continue editing the content or publish the item directly.
8.2 Editing an existing item
In addition to the CMS panel, you can also edit the content of CMS items directly in the page preview — just click on the text or image, similar to static content.
ATTENTION: If you edit an already published CMS item, you need to publish it again for the changes to appear on the website.
In the preview, you can switch between items using the button in the top bar or in the left sidebar with the overview of all pages.
In the page overview, you can identify the page type by its color:
- White pages = static pages
- Purple pages = CMS pages
- Orange pages = pages with specific CMS items that have unpublished changes
9. How to edit a page's SEO settings
In the left sidebar, under the Pages tab, hover over the selected page and click the ⚙️ Page settings button.
Here you can manage meta data and other SEO-related settings.
The Title (Title Tag) and description (Meta Description) are the texts people see in search engines. Content marked as is displayed when sharing a page on social media.
When you check the Same as SEO Title Tag and boxes, the meta data will automatically be copied to the Open Graph fields. The result might look like this:

In its SEO settings, Webflow offers the option to generate a title and description draft using AI. We always recommend reviewing the result.
Similarly, you can use AI to generate Schema Markup — structured data that helps search engines better understand page content (e.g., organization type, article, or product). You can verify the correctness of your schema markup using the Schema Markup Validator.
IMPORTANT: Changes to individual page settings must always be saved using the blue Save button in the top right corner of the window.
10. Collaboration and Support
10.1 Comments
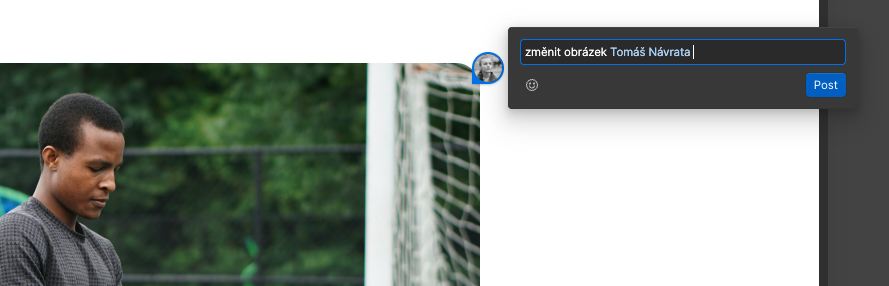
If you're unsure about an edit or want to notify a colleague, use comments. In the top bar, click the comment icon or press "C" on your keyboard. Click the element you want to comment on and type your message.
You can tag colleagues using the @ symbol. If you tag someone in a comment, they will receive a notification.
Comments are visible directly on the page during editing. You can reply to them in threads, share a link to a specific comment, or mark them as resolved after they've been addressed.
10.2 Editing Simultaneously with Colleagues
Multiple people can edit the website simultaneously — Webflow displays where others are on the page. The "last change wins" rule applies, so we recommend coordinating beforehand who will edit which page or section. Before publishing, please confirm that no one else is currently making changes.
Useful keyboard shortcuts:
Ctrl+Z (Mac: Cmd+Z) = undo
Ctrl+Shift+Z (Mac: Cmd+Shift+Z) = redo
10.3 If Something Isn't Working
If you come across an element that can't be edited, or need a change beyond the Content editor's capabilities (layout, new page, CMS structure changes), please contact us — these modifications require a designer's input, and we'll be happy to implement them for you.
Need help with Webflow?